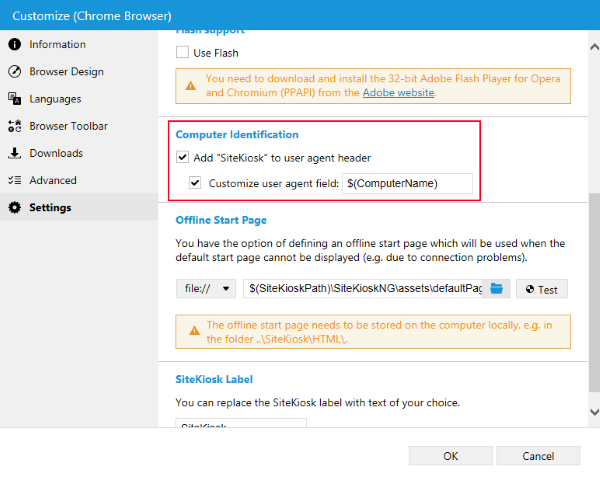
For compatibility reasons or identification purposes it can be useful or even necessary to modify the user agent of the browser. You can do that for the browser as a whole in the configuration of SiteKiosk under Start Page & Browser -> Customize.
Replacing the whole default user agent string of SiteKiosk instead of just adding something to it is described here (Chrome) and here (IE).
But a modification that helps on one website can lead to problems on another website. So it can be useful to edit the user agent only for certain pages while on others the default user agent is used. You can do this with SiteKiosk Windows by editing the configuration file of SiteKiosk with an editor like Notepad. Look for urlSpecificUserAgents in the file and create entries for your URL(s). There are two options, you can either just add something to the default user agent of SiteKiosk or you can fully replace the user agent.
This is how adding something to the default user agent for a specific URL looks like (as you can see, wildcards (*) are supported):
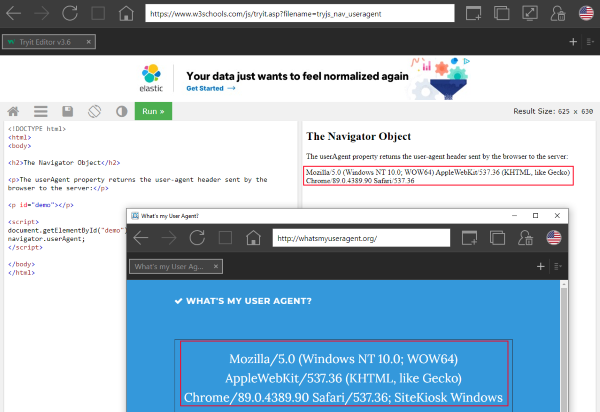
"url": "*whatsmyuseragent.org/*",
"userAgent": {
"add": "SiteKiosk Windows"
}
In this example SiteKiosk Windows is added to the default user agent for the specified page, while other pages receive the default user agent.
You can have as much different specific user agents as you need. This is how more than one looks like:
"urlSpecificUserAgents": [
{
  "url": "*.google.*",
  "userAgent": {
	"add": "Edg/$(ChromiumVersion)"
  },
  "url": "*whatsmyuseragent.org/*",
  "userAgent": {
	"add": "SiteKiosk Windows"
  }
}
],
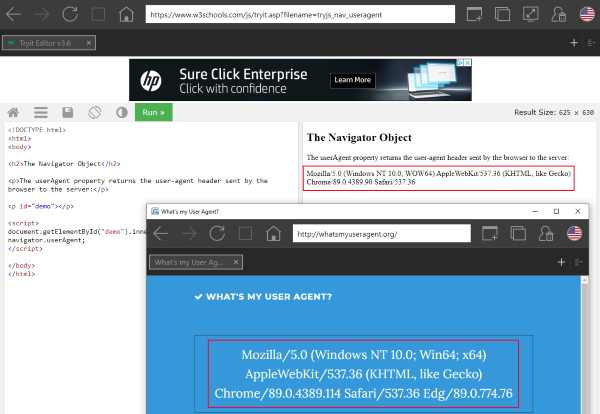
The option to replace the full user agent string with a custom one looks like this:
"url": "*whatsmyuseragent.org/*",
"userAgent": {
"full": "Mozilla/5.0 (Windows NT 10.0; Win64; x64) AppleWebKit/537.36 (KHTML, like Gecko) Chrome/89.0.4389.114 Safari/537.36 Edg/89.0.774.76"
}
This example uses the user agent string of Edge (Chromium engine).
Note that using a user agent that mimmicks another browser can lead to display problems with a webpage. Always test the settings before using them in your production environment.