If you want to display variants of a SiteCaster project that differ only in a few elements, you can use the tag feature in SiteCaster as a display condition.
In the following example, a SiteCaster project is published on two machines to display two variants of a project:
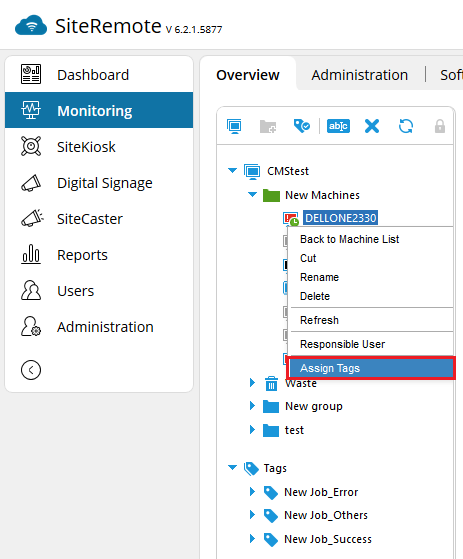
Log into your SiteRemote team and select the Monitoring tab. To generate tags for your machines, right click on a machine in the tree view and select Assign Tags.
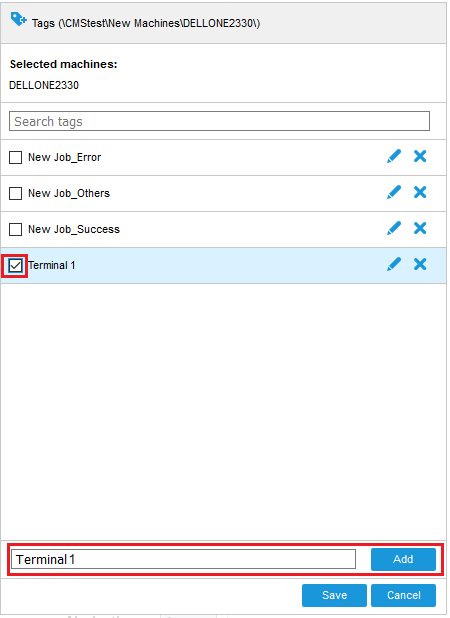
Then enter the name of your tags e.g. Terminal 1 and Terminal 2 press Add and select it using the checkbox. Confirm the setting with Save.In SiteCaster, generate your sample project using the empty template. Use the Add button to add a swap container to the project. Insert two different images into the swap container. In order to use the Tag display condition, you will need to enable the expert mode in SiteCaster. To do so, you need to insert &expert at the end of the URL in the URL address field of your browser and then press Enter to reload the project.

After activation of the expert mode you see the Expert Edit button in the tool bar.
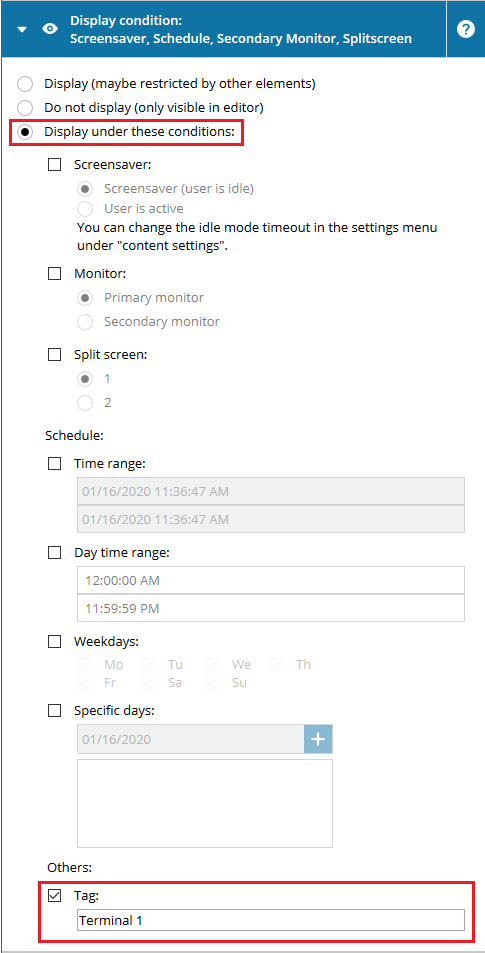
Then select one of the images and open the properties dialog by double-clicking on the image. Go to the section Display condition and select the Display under these conditions option. Activate the check box Tag and enter the tag name Terminal 1. Close the properties dialog with pressing the Save button. Activate the same setting on the other image with the tag name Terminal 2. After publishing the project to both clients the first image is displayed on the device with the tag Terminal 1 and the second image on the device with the tag Terminal 2. The described scenario can be extended with further tags as you like.
4a16cf91-99f5-4237-a76b-99029b6009a0|0|.0