In the last post we took a look at a method to add more than two custom buttons to the SiteKiosk Windows Chrome Browser. This time we will learn how to change the button icons to create an individual browser experience.
Note that you can easily change the general appearance of the SiteKiosk Windows Chrome Browser through the SiteKiosk configuration. Just go to Start Page & Browser -> Chrome Browser -> Customize -> Browser Design. Here you can change the colors of the different browser elements.
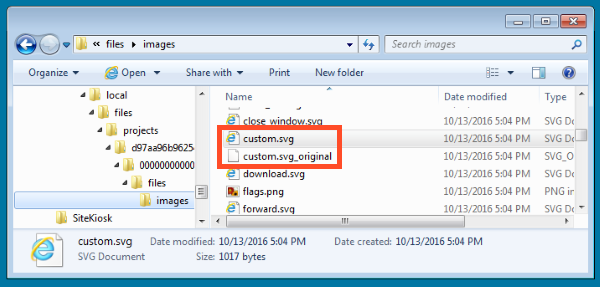
If you want to go a step further in customizing the SiteKiosk Windows Chrome Browser, you could use individual icons. All icons used by the browser can be found in the folder C:\Users\Public\SiteKiosk\data\content\local\files\projects\d97aa96b962543fcb39625a3f8e8d8fb\000000000000000000000000\files\images. They are available as scalable vector graphics (.svg format). As with every change you make to an existing application, you should make a backup of the original file. We will be using the icon for the custom buttons as an example to demonstrate the process.
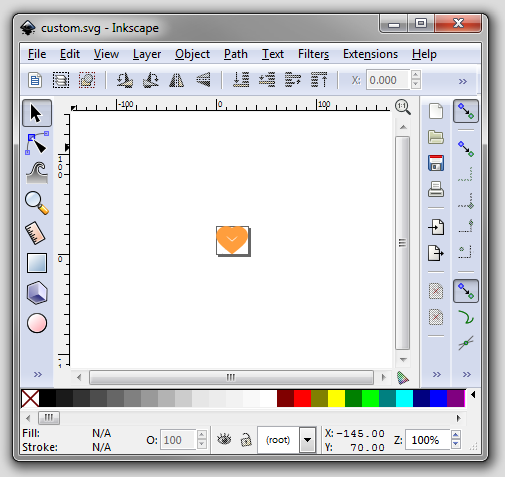
You can use the original file as a starting point to create your own icon. Open the .svg file with an appropriate editor like Inkscape and change it the way you want the icon to look. In our example we repaint the custom.svg to this new icon:
If we now open the SiteKiosk configuration editor and go to Start Page & Browser -> Chrome Browser -> Customize -> Browser Toolbar to configure a custom button that links to http://www.sitekiosk.com, the result will look like this:

You can apply the same process to any of the existing icons for SiteKiosk Windows Chrome Browser.
14ae53c5-6923-423b-9431-6a6c3be886eb|0|.0