If you want to display variants of a SiteCaster project that differ only in a few elements, you can use the tag feature in SiteCaster as a display condition.
In the following example, a SiteCaster project is published on two machines to display two variants of a project:
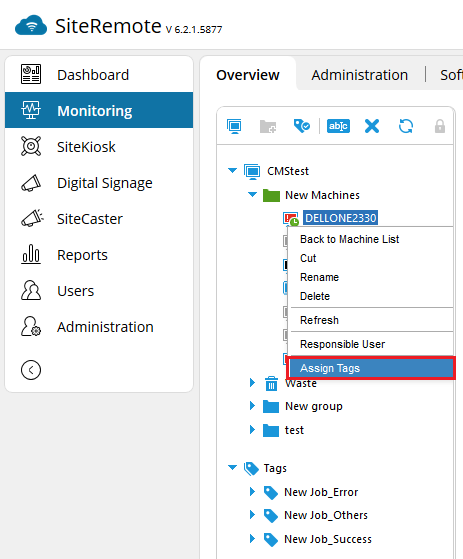
Log into your SiteRemote team and select the Monitoring tab. To generate tags for your machines, right click on a machine in the tree view and select Assign Tags.
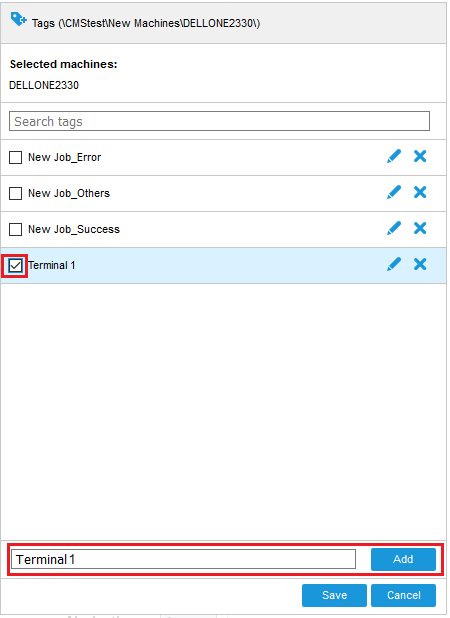
Then enter the name of your tags e.g. Terminal 1 and Terminal 2 press Add and select it using the checkbox. Confirm the setting with Save.In SiteCaster, generate your sample project using the empty template. Use the Add button to add a swap container to the project. Insert two different images into the swap container. In order to use the Tag display condition, you will need to enable the expert mode in SiteCaster. To do so, you need to insert &expert at the end of the URL in the URL address field of your browser and then press Enter to reload the project.

After activation of the expert mode you see the Expert Edit button in the tool bar.
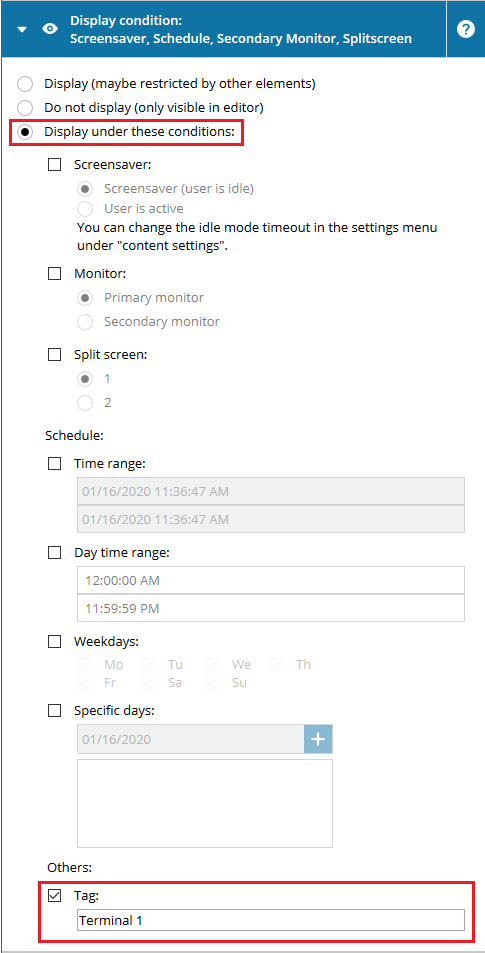
Then select one of the images and open the properties dialog by double-clicking on the image. Go to the section Display condition and select the Display under these conditions option. Activate the check box Tag and enter the tag name Terminal 1. Close the properties dialog with pressing the Save button. Activate the same setting on the other image with the tag name Terminal 2. After publishing the project to both clients the first image is displayed on the device with the tag Terminal 1 and the second image on the device with the tag Terminal 2. The described scenario can be extended with further tags as you like.
4a16cf91-99f5-4237-a76b-99029b6009a0|0|.0
Generally, SiteCaster loads webviews at the point where they first appear in a session in SiteCaster. In order to avoid reloading a webview each time again when it is displayed e.g. in container types like sequence, overflow container or swap container, it is always kept in the loaded state. This has the side effect that if the displayed webview contains audio elements these are also audible in the non-displayed state. If you want to prevent this you can use the expert setting shouldUnloadWhenHidden. Additionally you can use the setting shouldUnloadWhenHidden to bring certain webviews always in a newly loaded state when they are displayed.
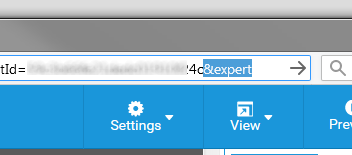
To activate the expert setting shouldUnloadWhenHidden, open the project in the SiteCaster editor. In the URL address field of your browser you must add &expert at the end of the URL and then press Enter to reload the project.

After activation of the expert mode you see the Expert Edit button in the tool bar. Create a webpage element on your project page, select it and press the Expert Edit button.
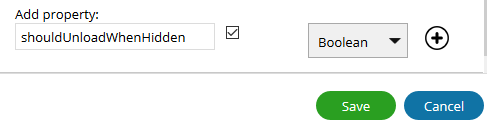
At the bottom of the Expert Settings dialog box enter the property shouldUnloadWhenHidden. In the dropdown menu on the right side select Boolean and activate the checkbox. Then press the plus button and save the setting.
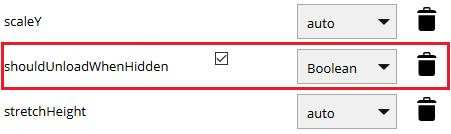
After pressing the expert setting there is an additional line shouldUnloadWhenHidden with activated checkbox displayed in the expert settings. Close the expert settings dialog with pressing the save button. After activation of this setting the webview will be unloaded when it is not displayed.
aec25c6d-8781-44d0-9e8b-fdfe14635417|0|.0
The SiteCaster Editor comes with an expert mode, that allows you to edit settings beyond their default value range. This gives you the opportunity to customize your projects to match very specific requirements. Feel free to experiment with this mode, but be aware that changing values beyond their default range is outside of the scope of our free support.
To enter the expert mode open a project to view the project page. Now click the address bar of your browser and append &expert to the URL. Make sure you place it at the very end of the URL and then press enter to open the expert mode.
Next select the element you want to customize. In our example we want to adjust the font size and the font family of the Time/Date element. To do that, click on the new advanced edit button you will see in the toolbar after entering the expert mode.
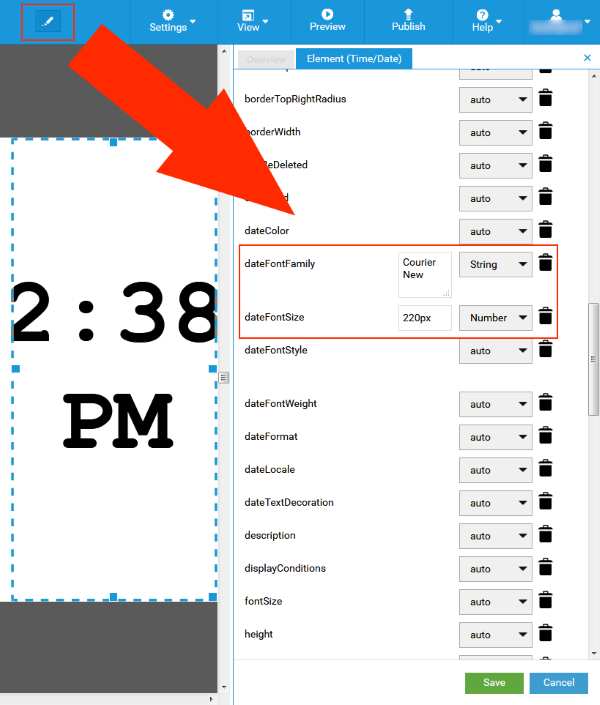
After clicking the button you will see a list of all properties of the selected element in the inspector. In the list you will find the dateFontFamily and dateFontSize properties. Use the drop-down of the dateFontFamily property to select String and type in the font family of your liking into the text field. For the dateFontSize property select Number from the dropdown and then type in the pixel value you want to choose. Click on the Save button after you are done to apply the changed values.
To give you an idea of the advanced possibilities you get from choosing the expert mode here is a view of the default options you have for the Time/Date element.
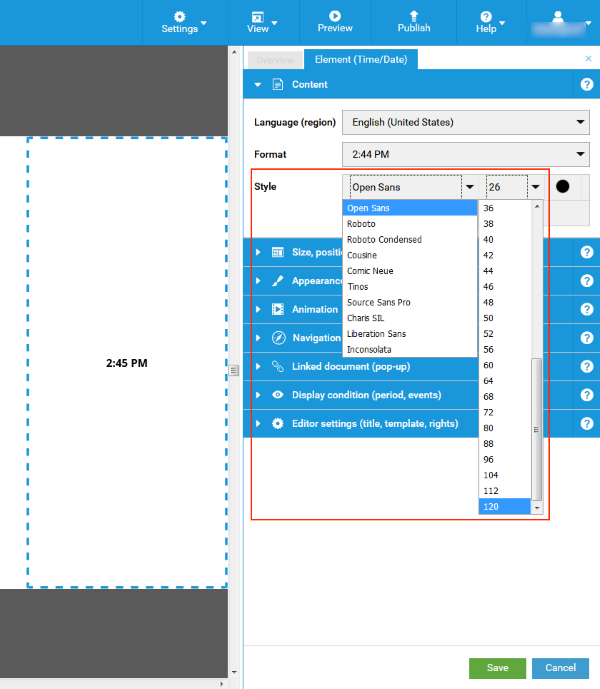
As you can see the default element will cover the needs of most users but when using the expert mode you can change the properties to whatever you like.
a365715d-50cf-4e62-8ae3-2083d99a6dfc|0|.0