The SiteKiosk Windows Start Screen is a powerful and easy to use tool to create a customized kiosk terminal experience. If you want to use the same Start Screen setup, either newly created or changed, on more than one kiosk system, you can distribute the required files using different methods. In case your environment only includes a handful of PCs at the same location you may just use a USB stick, otherwise the more comfortable method is to use SiteRemote.
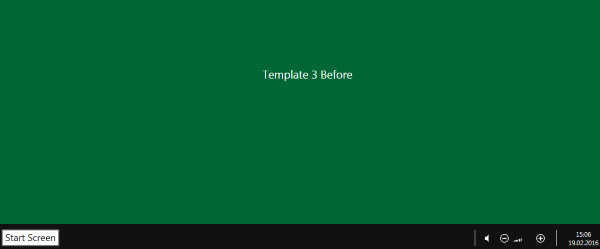
For our test scenario we create a very simple Start Screen using Template 3, that only includes a monochrome background and a text. Note that the complexity of the Start Screen you create does not alter the described scenario in any way. This is what our starting design will look like:
Once you are done creating or changing your Start Screen you need to save it by clicking on the corresponding icon in the Start Screen Editor. Once this is done you are presented with a dialog that tells you where all the files associated with the Start Screen are located. It will be the same location on all your SiteKiosk Windows installations (C:\Users\Public\SiteKiosk\content):
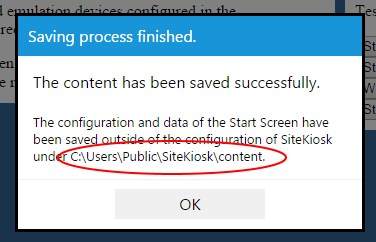
You will get this information dialog whenever you make any changes. This is a reminder that you now may need to distribute the changed files to all your PCs. You can now copy the content folder onto a USB stick and then copy the folder to the exact same location on all your machines, overwriting the previous version or use SiteRemote to achieve this. How to use SiteRemote for this purpose is what we want to look at in a little more detail.
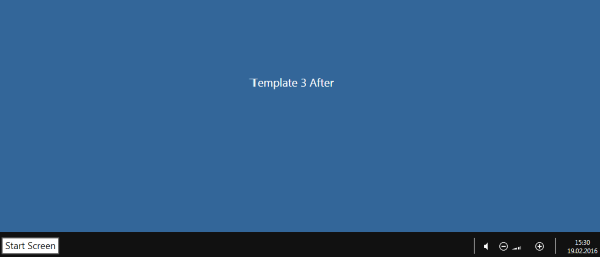
First we create a new simple Start Screen design that will look different than the original design to symbolize the changes:
Again the changes need to be saved when leaving the Start Screen Editor. Once this has been successfully done, we open the Windows Explorer and browser to the content folder at C:\Users\Public\SiteKiosk. If you right click the content folder you can select Send to and then choose Compressed (zipped) folder. This results in a content.zip file at this very location:

Now we need a small tool that will unzip the folder once we have distributed it through SiteRemote. You can for example use the command line version of 7-Zip. The application is called 7za.exe and is available here in the 7-Zip Extra package.
Next just login to your SiteRemote team, go to the SiteKiosk tab and select Jobs from the submenu. Create a new job (you may save it as a job template if you like):
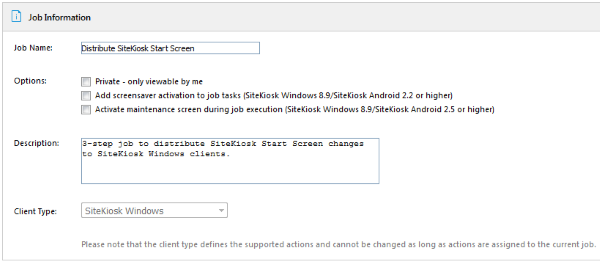
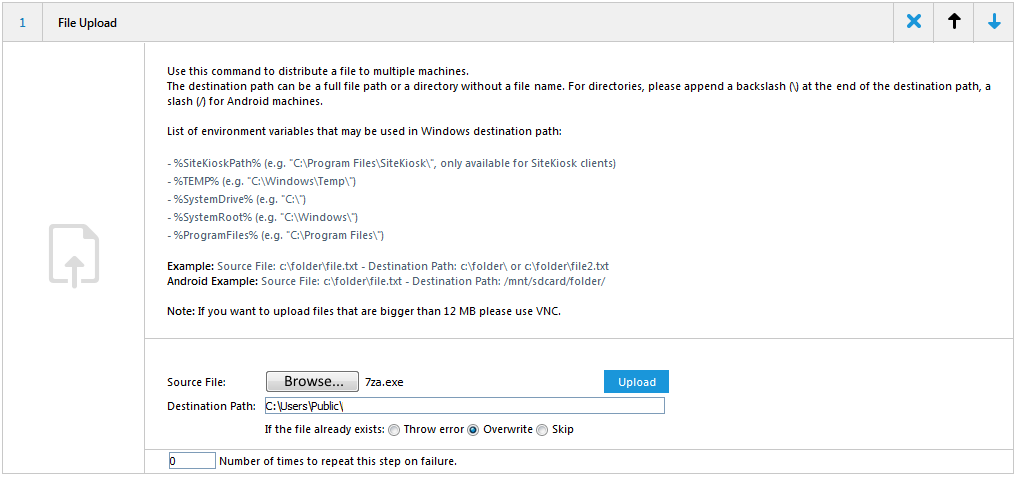
Set Job Name and Description to your liking and select SiteKiosk Windows as the Client Type. Now you need to add three job steps. The first one will be a File Upload that will place the 7za.exe file in the C:\Users\Public\ folder. Make sure to use the slash at the end of the file path. Also choose Overwrite to make sure any existing version at that location is overwritten:
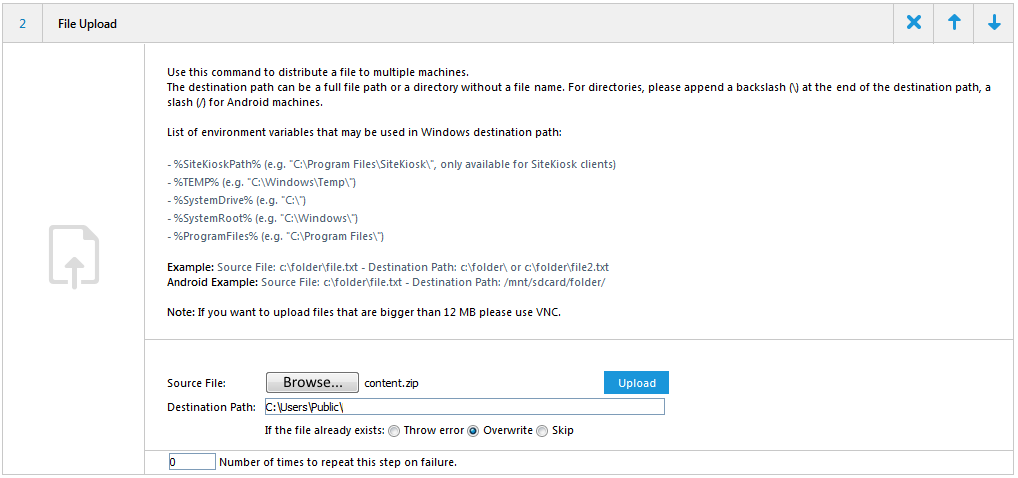
The second step will again be a File Upload and upload the content.zip file with the complete Start Screen content. Use the same settings as with the first step:
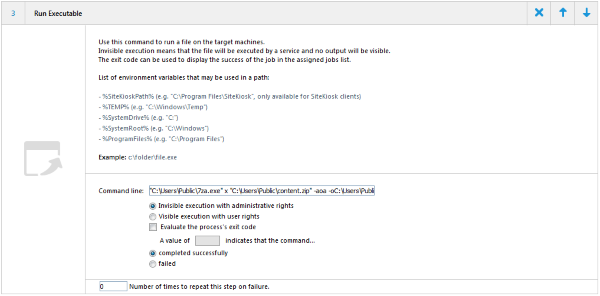
The third and last step will be of the Run Executable type. If will use the following command line to run 7za.exe and unzip the content of the content.zip archive to its final destination:
"C:\Users\Public\7za.exe" x "C:\Users\Public\content.zip" -aoa -oC:\Users\Public\SiteKiosk
Leave the other options as they are, especially leave Invisible execution with administrative rights selected:
Finally assign the jobs to the desired machines and wait for it to complete. Note that the changes will only come into play once the Start Screen is refreshed, to speed things up you can send another SiteRemote job that restarts SiteKiosk.