The following developer blog entry describes how to open certain file types in predefined applications over the download manager. This developer blog entry works only with SiteKiosk Online for Windows.
We start by creating a project using the browser template.
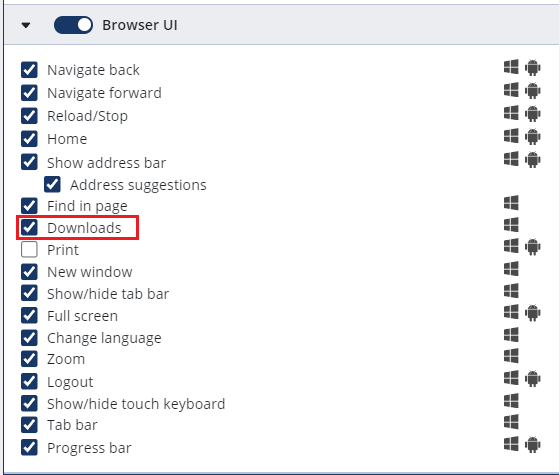
In the Webpage element settings, under Browser UI, select the Downloads checkbox and save the setting.
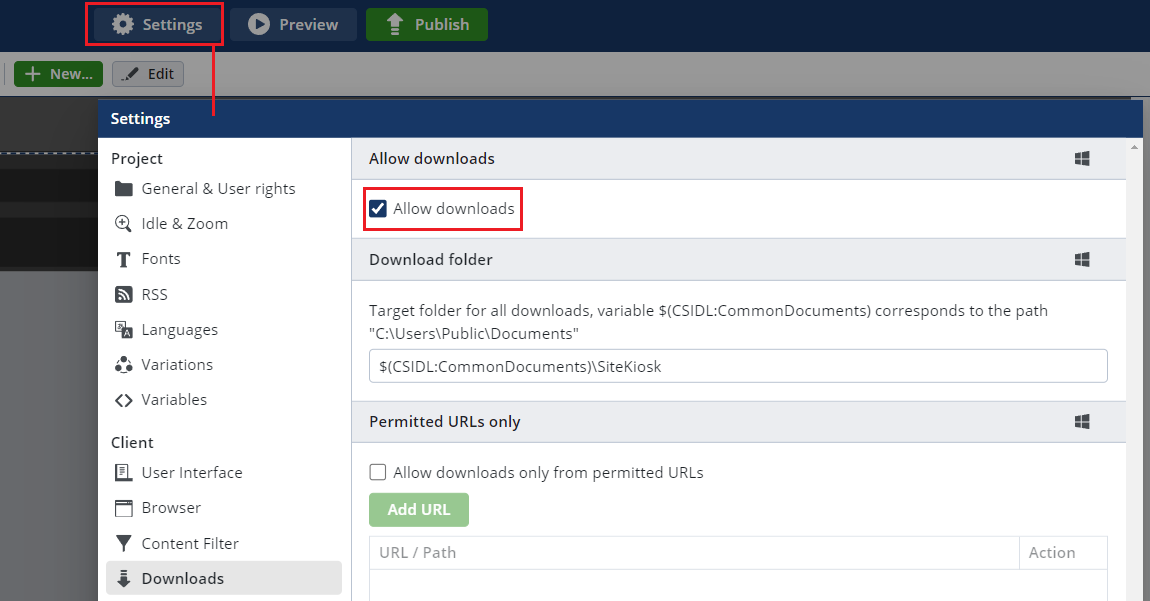
In the project, press the Settings button and in the Downloads section, select the Allow Downloads check box.
Go to Settings - Client - Advanced and press the Add settings button.

Enter the path downloads.downloadFileActions which offers you following default value:
[
    {
        "extension": "pdf",
        "customApplicationPath": "",
        "actionType": "openInSiteKiosk",
        "autoExecute": true
    },
    {
        "extension": "txt",
        "customApplicationPath": "",
        "actionType": "openInSiteKiosk",
        "autoExecute": true
    },
    {
        "extension": "png",
        "customApplicationPath": "",
        "actionType": "openInSiteKiosk",
        "autoExecute": true
    },
    {
        "extension": "gif",
        "customApplicationPath": "",
        "actionType": "openInSiteKiosk",
        "autoExecute": true
    },
    {
        "extension": "jpg",
        "customApplicationPath": "",
        "actionType": "openInSiteKiosk",
        "autoExecute": true
    },
    {
        "extension": "jpeg",
        "customApplicationPath": "",
        "actionType": "openInSiteKiosk",
        "autoExecute": true
    },
    {
        "extension": "exe",
        "customApplicationPath": "",
        "actionType": "downloadOnly",
        "autoExecute": false
    },
    {
        "extension": "zip",
        "customApplicationPath": "",
        "actionType": "downloadOnly",
        "autoExecute": false
    },
    {
        "extension": "7z",
        "customApplicationPath": "",
        "actionType": "downloadOnly",
        "autoExecute": false
    }
]
Copy the complete value section and enter the content to texteditor application.
Now you have two options to configure the file action: OpenWithCustomApplication to open Files with a defined extension over a custom application or OpenWithWindowsStandardApplication, to launch the standard application of the system. In the Following example we change the entry for the extension pdf from:
{
        "extension": "pdf",
        "customApplicationPath": "",
        "actionType": "openInSiteKiosk",
        "autoExecute": true
    },
to
{
        "extension": "pdf",
        "customApplicationPath": "C:\\Program Files\\Adobe\\Acrobat DC\\Acrobat\\Acrobat.exe",
        "actionType": "OpenWithCustomApplication",
        "autoExecute": false
    },
So with pressing the Open Button on a downloaded PDF file in the download manager the PDF will be opened with the Acrobat Reader.
In the second example, we add the following entry at the end of the array separated by a comma to the previous entry:
{

        "extension": "docx",
        "customApplicationPath": "",
        "actionType": "OpenWithWindowsStandardApplication",
        "autoExecute": false

    }
So with pressing the Open Button on a downloaded docx file in the download manager the file will be opened with the standard application Word. With these modification the value looks like this.
Example:
Path: downloads.downloadFileActions
Value:
[
    {

        "extension": "pdf",
        "customApplicationPath": "C:\\Program Files\\Adobe\\Acrobat DC\\Acrobat\\Acrobat.exe",
        "actionType": "OpenWithCustomApplication",
        "autoExecute": false
    },
    {
        "extension": "txt",
        "customApplicationPath": "",
        "actionType": "openInSiteKiosk",
        "autoExecute": true
    },
    {

        "extension": "png",
        "customApplicationPath": "",
        "actionType": "openInSiteKiosk",
        "autoExecute": true
    },
    {

        "extension": "gif",
        "customApplicationPath": "",
        "actionType": "openInSiteKiosk",
        "autoExecute": true
    },
    {
        "extension": "jpg",
        "customApplicationPath": "",
        "actionType": "openInSiteKiosk",
        "autoExecute": true
    },
    {

        "extension": "jpeg",
        "customApplicationPath": "",
        "actionType": "openInSiteKiosk",
        "autoExecute": true
    },
    {
        "extension": "exe",
        "customApplicationPath": "",
        "actionType": "downloadOnly",
        "autoExecute": false
    },
    {
        "extension": "zip",
        "customApplicationPath": "",
        "actionType": "downloadOnly",
        "autoExecute": false
    },
    {
        "extension": "7z",
        "customApplicationPath": "",
        "actionType": "downloadOnly",
        "autoExecute": false
    },
    {
        "extension": "docx",
        "customApplicationPath": "",
        "actionType": "OpenWithWindowsStandardApplication",
        "autoExecute": false
    }
]
Copy and paste the whole value to the advance setting dialogue and save the advanced setting.
Publish the project to the client on which Adobe Acrobat Reader is installed and Word is set the default app to open docx.
To test the file actions download a Word and a PDF file and open them over the download manager.