The following developer blog entry describes how to control videos across devices. In this setting one device acts as a remote control and the other device is the player of the video. This developer blog entry works with SiteKiosk Online for Windows and Android clients.
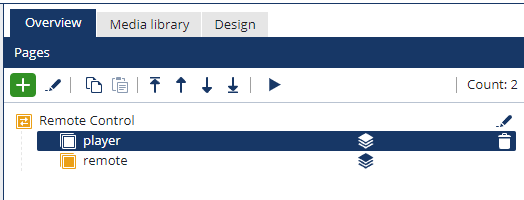
In this example the project consists of two pages. A player page for the client which displayes the video and a remote page for the client which displays the play button.
1. Create a project using the Empty template.
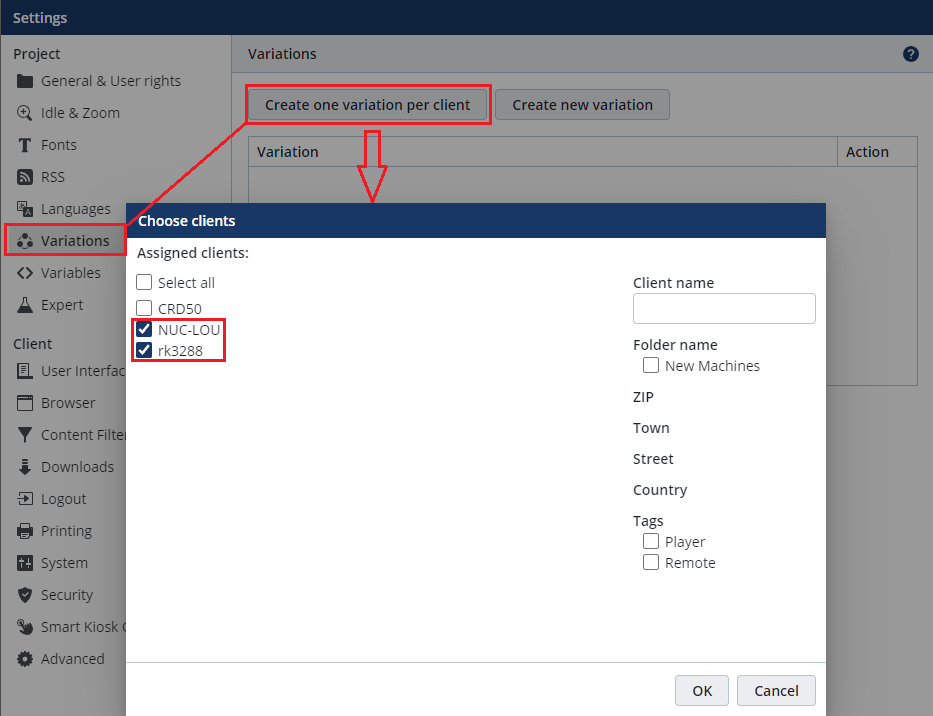
2. Press the Settings button in the toolbar on the top and select "Variations" in the treeview.
3. Press the button "Create one variation per client" and check the checkbox Assigned clients for two clients. Close the dialog with save.
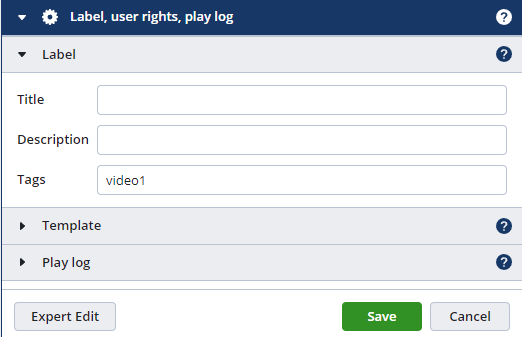
4. Select the page in the Pages section and press the Edit button. Go to the last section Label, user rights, playlog and give the page the title player.
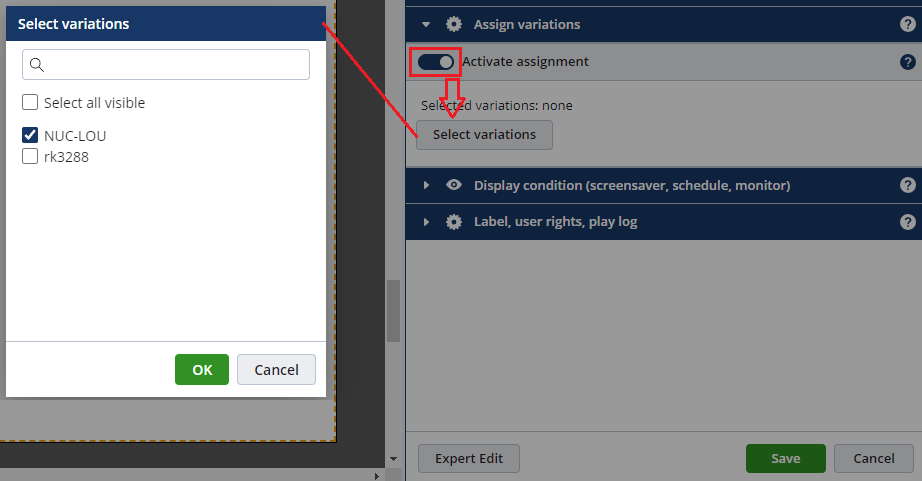
5. Go to the section Assign variations, use the "Activate assignment" switch and select under "Select variations" the variation on which the video should be displayed.
6. Add a video element to the "player" page using the "+ New" button.
7. Press the Edit button to open the properties dialog of the video element.
8. In the Video settings section upload a video file and disable "Automatic playback start" and "Loop".
9. Go to the last section Label, user rights, playlog and give the video the tag name "video1" under Tags.
10. In the Pages section (upper right) add another page using the + button, select "Empty (no template)" and give it the title remote.
11. Double click on the "remote" page, go to the "Assign variations" section, press the "Activate assignment" button and select variation (client/s) on which the play button for the video should be displayed under "Select variations".
12. Close the properties dialog with pressing the "Save" button.
13. Enter &expert in the URL address line at the end of the URL.

14. Select the URL and press Enter to reload the project.
15. Add an image element to the remote page using the "+ New Button" to create a play button for the video.
16. Double click to open the properties dialog of the image element.
17. Upload an image file in the Image section.
18. Press the Expert Edit button at the bottom left.

19. Go down in the Expert section and enter triggerActions in the Add properties edit box.
20. Then add the following lines in the box on the bottom and select JSON object:
{
  "pressed": {
    "actions": [
      {
        "type": "sendCommand",
        "command": "call-element-method",
        "commandArguments": {
          "methodArgs": [
            true
          ],
          "methodName": "play",
          "targetTag": "video1"
        },
        "targetMachine": "tags=Remote,Player"
      }
    ]
  }
}
21. Press the Add button and close the properties dialog of the image element with pressing Save.
Note: Under methodName you can also use the following methods:
interactivePause pauses the video
interactiveStop stops the video
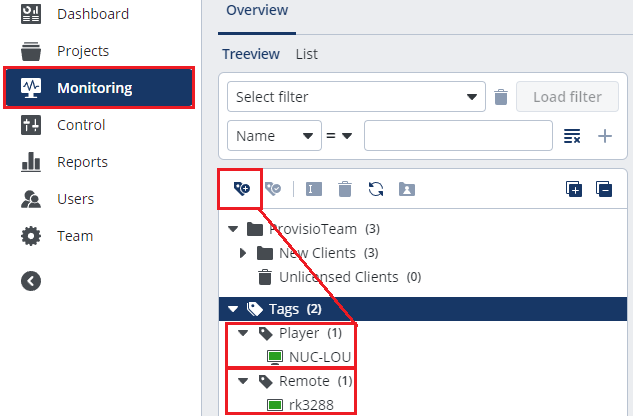
22. Leave the "Projects" section, go to the "Monitoring" page and create two tags "Player" and "Remote" (without quotation marks)
23. Add the respective machine to the tag.
24. Go back to the project and publish the project to the two clients.
25. After publishing, the Remote page with the Play button is displayed on the Remote client and the Player page with the video is displayed on the Player client.
Test whether clicking the created play button plays the video.