The PROVISIO Developer Blog has many examples of how to use the SiteKiosk Object Model in the browsers of SiteKiosk Windows and SiteKiosk Android or as an external script in SiteKiosk Windows. This time we will look at a short example that shows you how to use the Object Model in SiteCaster as well.
Because SiteCaster is Chrome-based, it uses the new SiteKiosk Object Model for Chrome. This Object Model is still in the making, the most current state of the preliminary documentation can be obtained through our support department. Interested developers can just send us a short email.
The example code is for SiteKiosk Windows and will show you how you can start an external application from a SiteCaster element.
The first step is to create an html page that will open an application by using the SiteKiosk Object Model. The code for the simple test web page looks like this:
1 2 3 4 5 6 7 8 9 10 11 12 13 14 15 16 17 18 19 20 21 22 23 | <!DOCTYPE html>
<html>
<head>
<title></title>
<script>
(new Function(_siteKiosk.getSiteKioskObjectModelCode()))();
</script>
</head>
<body style="margin:0px;text-align:center;background-color:#FFD932;">
<input id="id_test" type="button" value="Test" style="margin-top:50px;" />
</body>
<script type="text/javascript">
siteKiosk.ready(function (){
document.getElementById("id_test").onclick = function () {dotest();};
function dotest(){
siteKiosk.system.windows.skLegacy.externalApps.run("C:\\Program Files (x86)\\Notepad++\\notepad++.exe", false);
}
}());
</script>
</html>
|
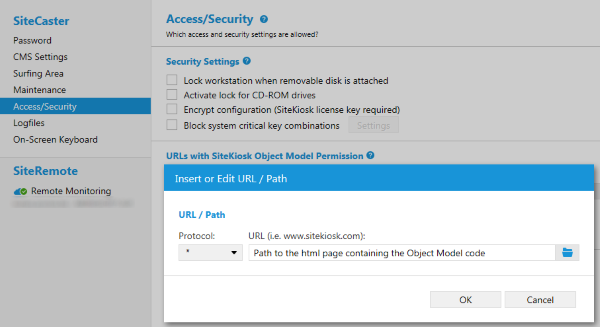
You need to initialize the SiteKiosk Object Model by running _siteKiosk.getSiteKioskObjectModelCode(). The method siteKiosk.system.windows.skLegacy.externalApps.run(path,checkifalreadyrunning) will start the specified application. The first parameter is a string containing the path (and optional start parameters) to the local application on the machine SiteCaster is running on. The second parameter is a boolean value that specifies whether SiteKiosk should check if the application is alreay running or start additional instances. The page can either be stored locally on the machine where SiteCaster is running or on a web server. Either way, you need to make sure that the URL or path of the file has been added in the SiteCaster configuration of SiteKiosk as an URL with script permission.

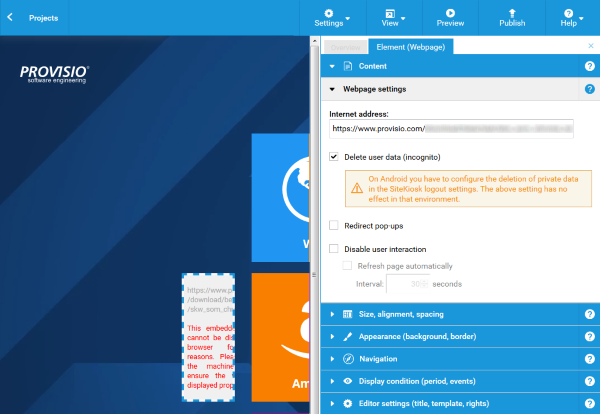
The second step is to add the page to SiteCaster. Go to your SiteCaster team and either edit an existing project or create a new one. In this example I use the Start Screen template and add a new Webpage element to the left of the existing center elements.

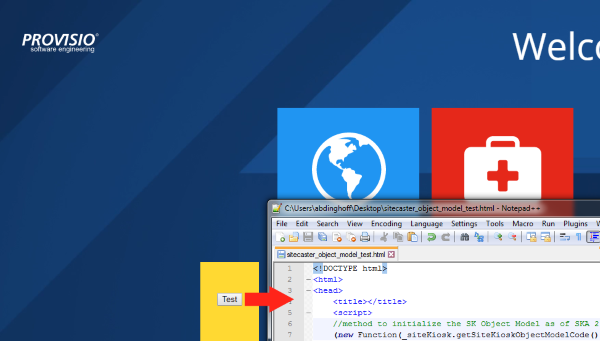
Step three is publishing the project to the assigned machines where you can then push a button to start a local Windows application from SiteCaster.

Note that depending on the nature of the started application you might want to consider making additional configuration and/or script changes to handle closing the application or allowing/blocking certain dialogs of the application.
Be the first to rate this post
- Currently .0/5 Stars.
- 1
- 2
- 3
- 4
- 5